| 
|
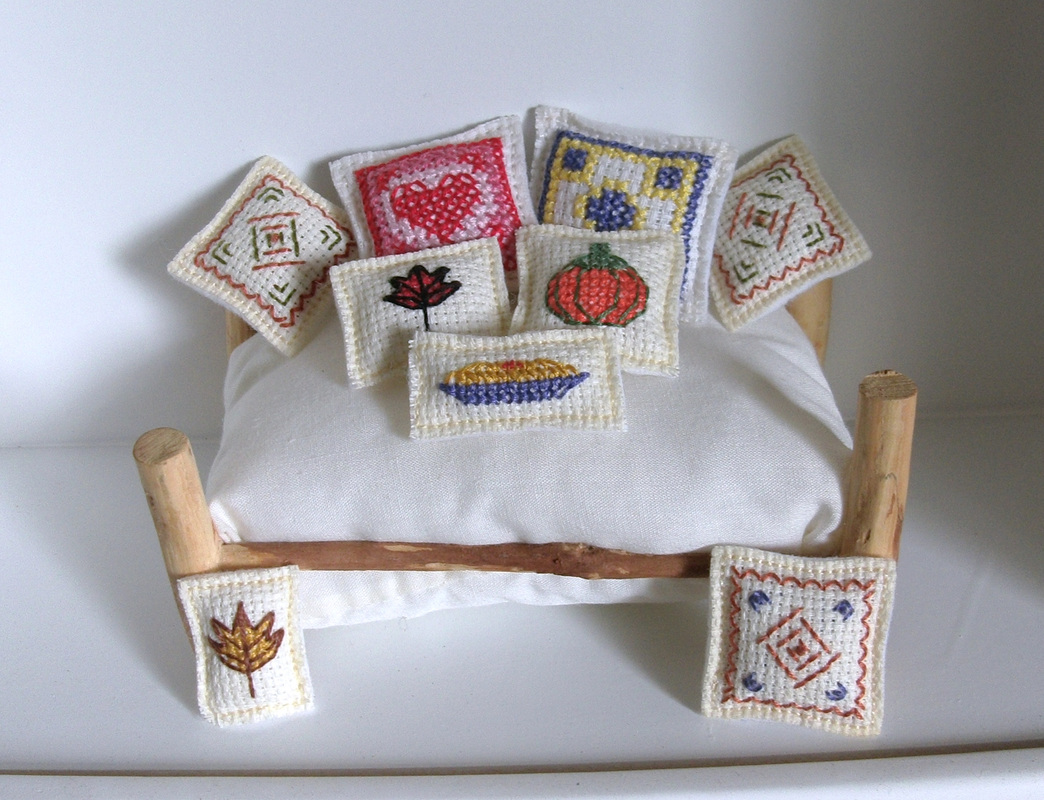
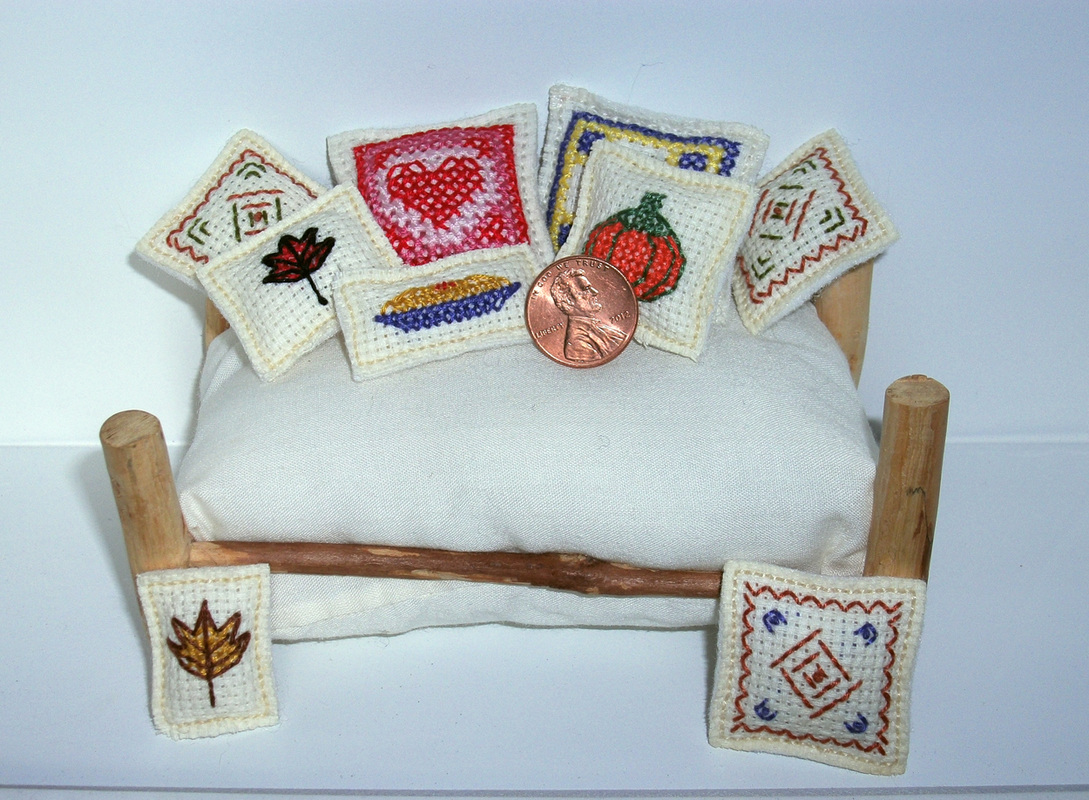
My camera is well again!! Pictured above are some of my cross-stitch designs for miniature pillows. These were great and easy to turn into pillows.
To make easy pillows: (example of pillows above)
What you will need:
- what ever design materials you want for the front of pillow (above dmc floss & cross-stitch cloth of various counts)
- felt fabric, color of your choice, for the pillow backing
- thread to match the fabric used for the front of pillow
- what ever stuffing you wish to use (above has polyester fiber fill)
- no-sew hemming glue (what ever brand is the most clear when dry)
1. Once the design for the front of the pillow is complete, cut it out with 1/4" square boarder.
2. Lay the finished front on top of felt cloth (it usually holds to the felt) and cut the felt the same size
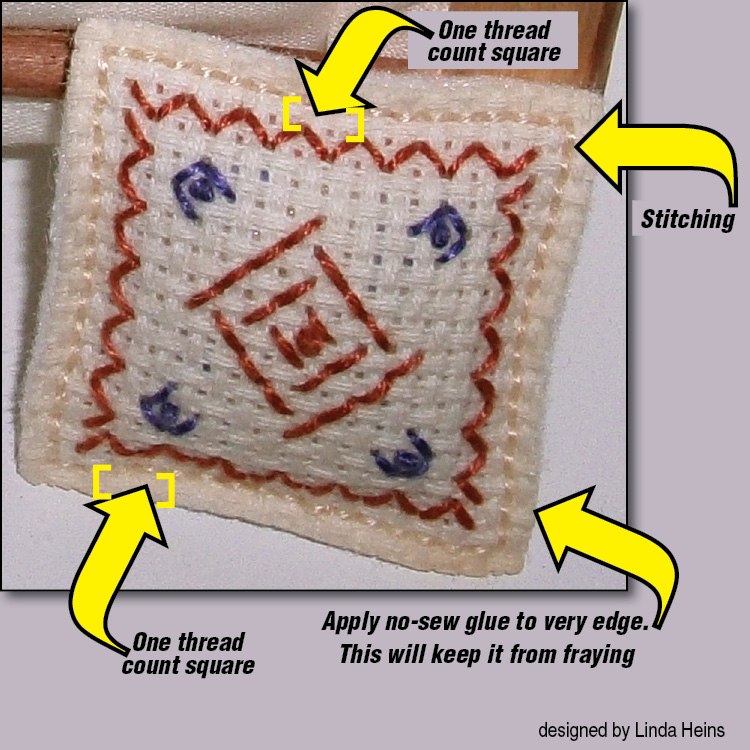
3. With the front design FACE UP on top of the felt, sew closed (with the thread) three of the four sides. For the square designs I went out one threat count square from the outer edge of the design (see photo below)
4. Once three sides have been sewn, stuff the pillow to desired plumpness.
5. Sew up the remaining side.
6. Cut off any excess fabric within one thread count square of the stitching. (see photo below)
6. Apply just enough no-sew glue to saturate the outer edge of the cross-stitch fabric. This will keep it from fraying. Let dry and you are ready to decorate your dollhouse in comfortable style. (see photo below)
To make easy pillows: (example of pillows above)
What you will need:
- what ever design materials you want for the front of pillow (above dmc floss & cross-stitch cloth of various counts)
- felt fabric, color of your choice, for the pillow backing
- thread to match the fabric used for the front of pillow
- what ever stuffing you wish to use (above has polyester fiber fill)
- no-sew hemming glue (what ever brand is the most clear when dry)
1. Once the design for the front of the pillow is complete, cut it out with 1/4" square boarder.
2. Lay the finished front on top of felt cloth (it usually holds to the felt) and cut the felt the same size
3. With the front design FACE UP on top of the felt, sew closed (with the thread) three of the four sides. For the square designs I went out one threat count square from the outer edge of the design (see photo below)
4. Once three sides have been sewn, stuff the pillow to desired plumpness.
5. Sew up the remaining side.
6. Cut off any excess fabric within one thread count square of the stitching. (see photo below)
6. Apply just enough no-sew glue to saturate the outer edge of the cross-stitch fabric. This will keep it from fraying. Let dry and you are ready to decorate your dollhouse in comfortable style. (see photo below)
 RSS Feed